
SQL 2012 Management Studio Installation Guide
Step 1:
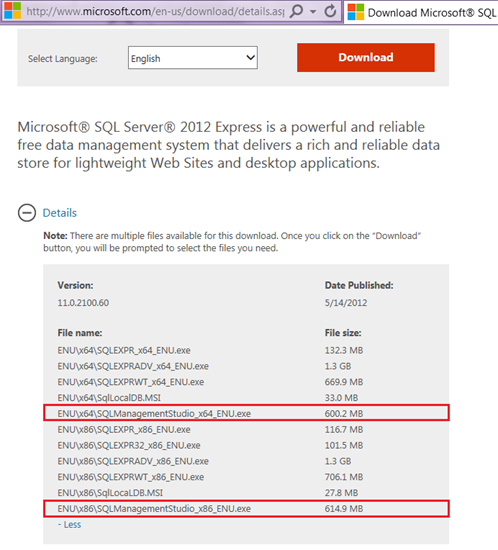
First of all, you need to download SQL Server Management Studio (SSMS) installation files (SQLManagementStudio_x64_ENU.exe / SQLManagementStudio_x86_ENU.exe) from the SQL Server download page depending on your server type (x64,x86) and keep it in a separate folder.
Step 2:
Once you downloaded the respective file as per your server type, select “New SQL Server stand-alone installation or add features to an existing installation” to proceed with the installation.

Step 3:
Once you select the “New SQL Server stand-alone installation or add features to an existing installation” option, it will check the setup rules (pre-requisites) on the server and take you to the license terms screen. The license terms must be read and accepted like with any other application’s license terms. Please note that your server must pass the setup rules in order to proceed with the installation.

Step 4:
Once you accept the license terms, it is time to scan all the available product updates. The required updates, size and details will be displayed. However, if you need further details, you can select More Information which will take you to the support page where you will find all the details related to the updates. You can ignore these updates by deselecting the ‘Include SQL Server product updates’ option at this stage.
I highly recommend that you download these updates along with the installation. This step might take some time depending on the size of the update files.

Step 5:
The next step is the Install Setup Files step, where SQL Server Management Studio (SSMS) setup will download, extract and install all necessary setup files to your server.

Step 6:
Click on Select All button and next to continue

Step 7:
In this step, SQL Server Management Studio (SSMS) setup will check the installation rules (pre-requisite for the SSMS). Just click on the Next button to continue.
Step 8:
In this step, SQL Server Management Studio (SSMS) setup will verify the disk space. Please make sure that you have sufficient disk space available. Not having sufficient disk space may result in a faulty installation. Just click on the Next button to continue.

Step 9:
Click next to Continue
Step 10:
Once you click on the Next button, setup checks the installation configuration rules and if it passed, setup continues. This step will take some time to install SQL Server Management Studio.

Step 11:
This step displays the installation status of SQL Server Management Studio (SSMS) along with each feature, like a summary. Click close to finish.

Comments
0 comments
Please sign in to leave a comment.